Worldwide Pricing and Secure Global Shipping Available!
- Get a QuickQuote
- Free Consultation +1 (714) 578-6100
- Track Order Sorry, no orders are open for tracking
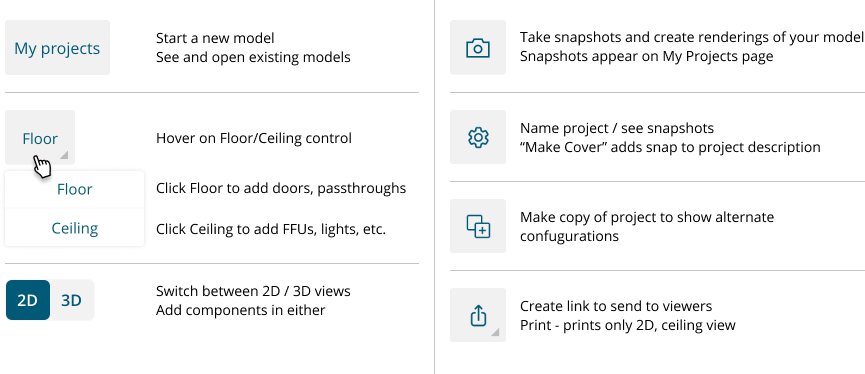
- Home
- Design My Cleanroom
PASSWORD REQUIRED
for
Move Camera: UP DOWN LEFT🠊 RIGHT🠈 TOWARD🠉 AWAY🠋
Cleanroom Design Tutorials
Design and model your
cleanroom in 4 easy steps
- See in 2D & 3D
- See floor & ceiling layouts
- Share file with colleagues
Include doors, passthroughs, FFUs, lights, control panels, heights to 12’
Designing is fast and easy, click Start Tutorial to begin.
Cleanroom Design Tutorials
Design and model your cleanroom
Tutorial Topics
-
 Rotate 3D models, add doors, passthroughs, fan filter units (FFUs), ceiling lights.
 -
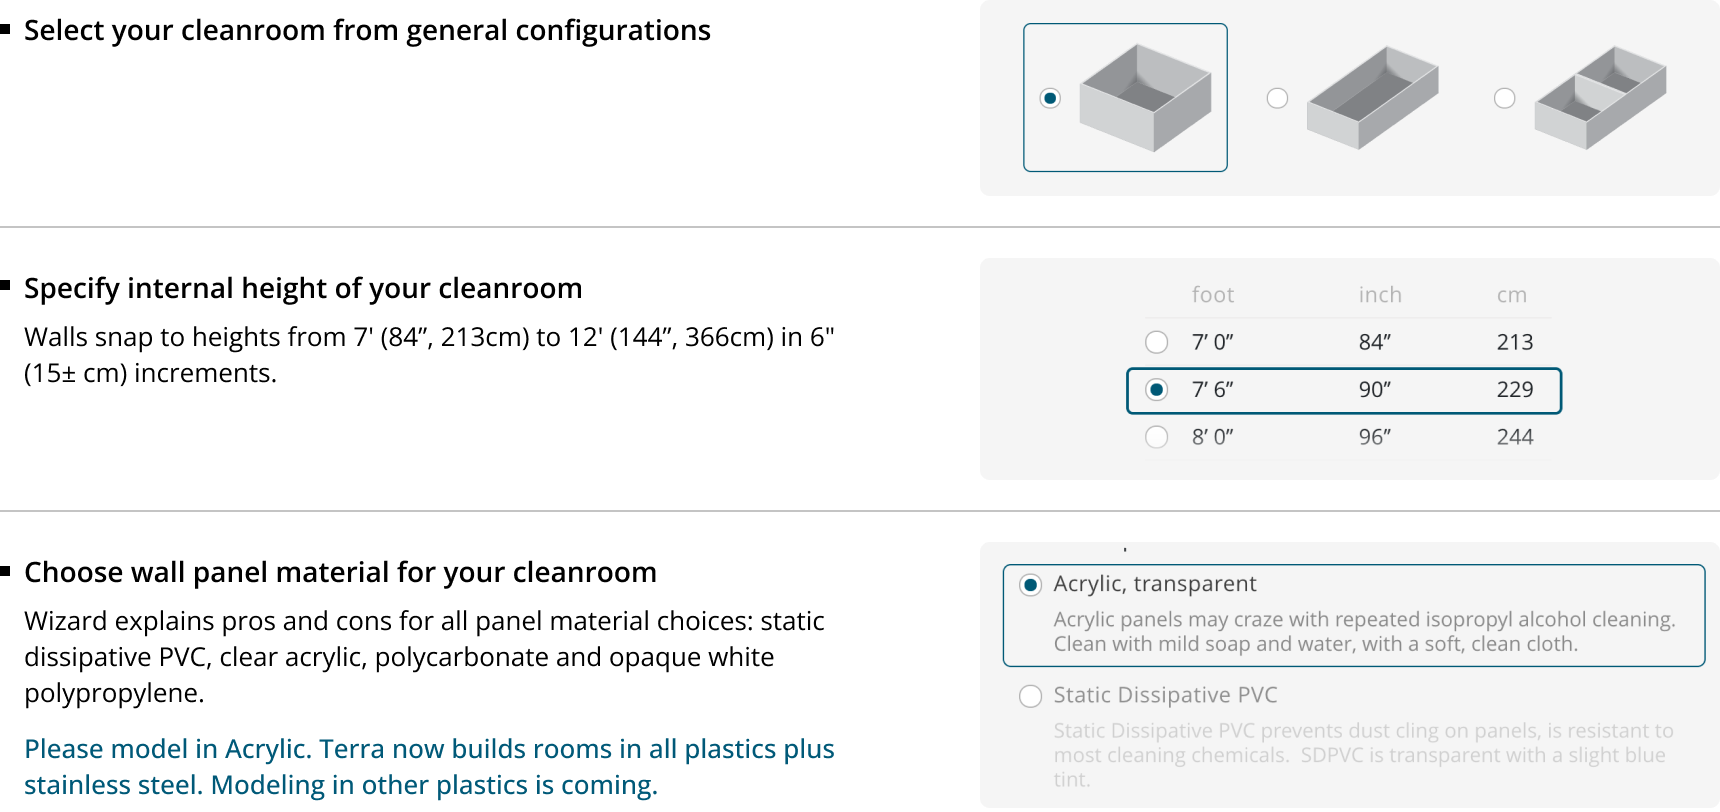
 Specifying room shape, height and wall materials
 -
 Dragging exterior walls to correct dimensions
 -
 Adding interior walls
 -
 Adding and configuring doors and passthroughts
 -
 Adding FFUs and lights to ceiling
 - Review menu choices
1. Specifying room shape, height and wall materials
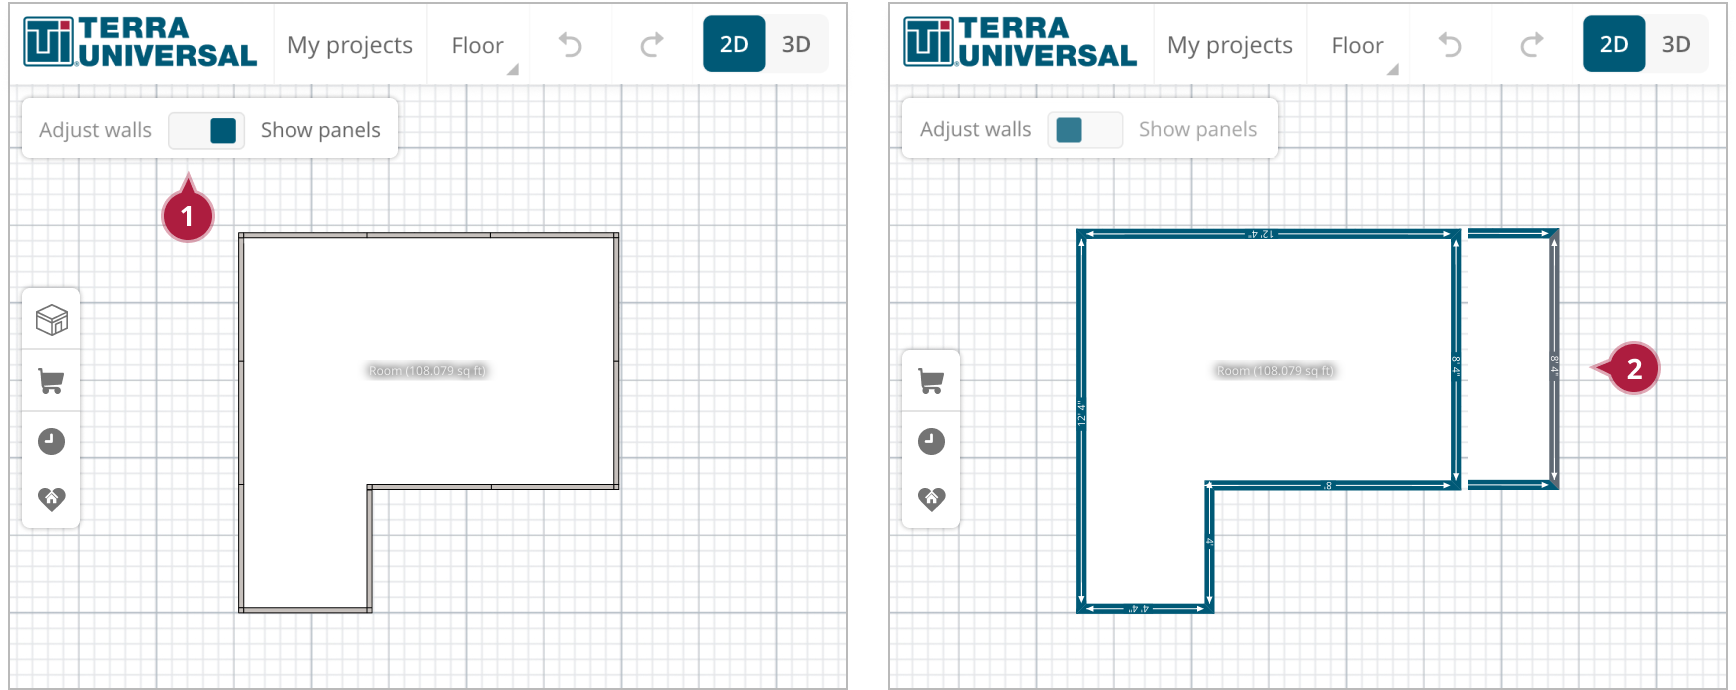
2. Dragging exterior walls to correct dimensions
-
- 1 Click to adjust walls
- 2 Click a wall to select, then drag to correct dimension.
-
-
Designer snaps wall to 2’ (62cm) grid, squares walls and fills with wall panels. Maximum wall length is 20’ (6.1m).
Exterior dimensions shown are shown, internal lengths are 4” shorter
-
Designer snaps wall to 2’ (62cm) grid, squares walls and fills with wall panels. Maximum wall length is 20’ (6.1m).
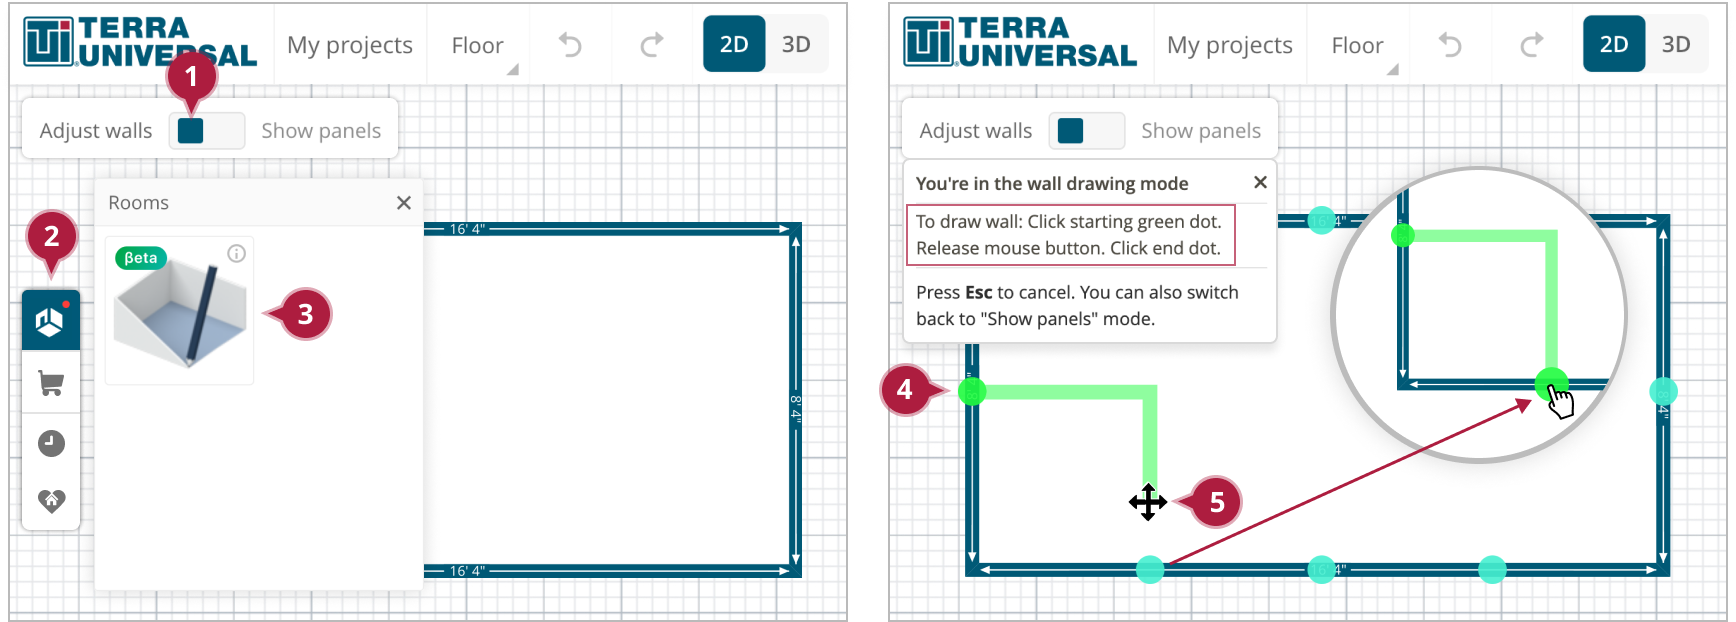
3. Adding interior walls
-
- 1 Click Adjust walls
- 2 Click interior walls selector
- 3 Select interior wall drawing tool - green dots appear
-
- 4 To draw a wall, hover over starting blue dot. When dot grows and turns green, click and release
- 5 Move mouse to end dot and hover. When dot grows and turns green, click and release
4. Adding and configuring doors and passthroughts
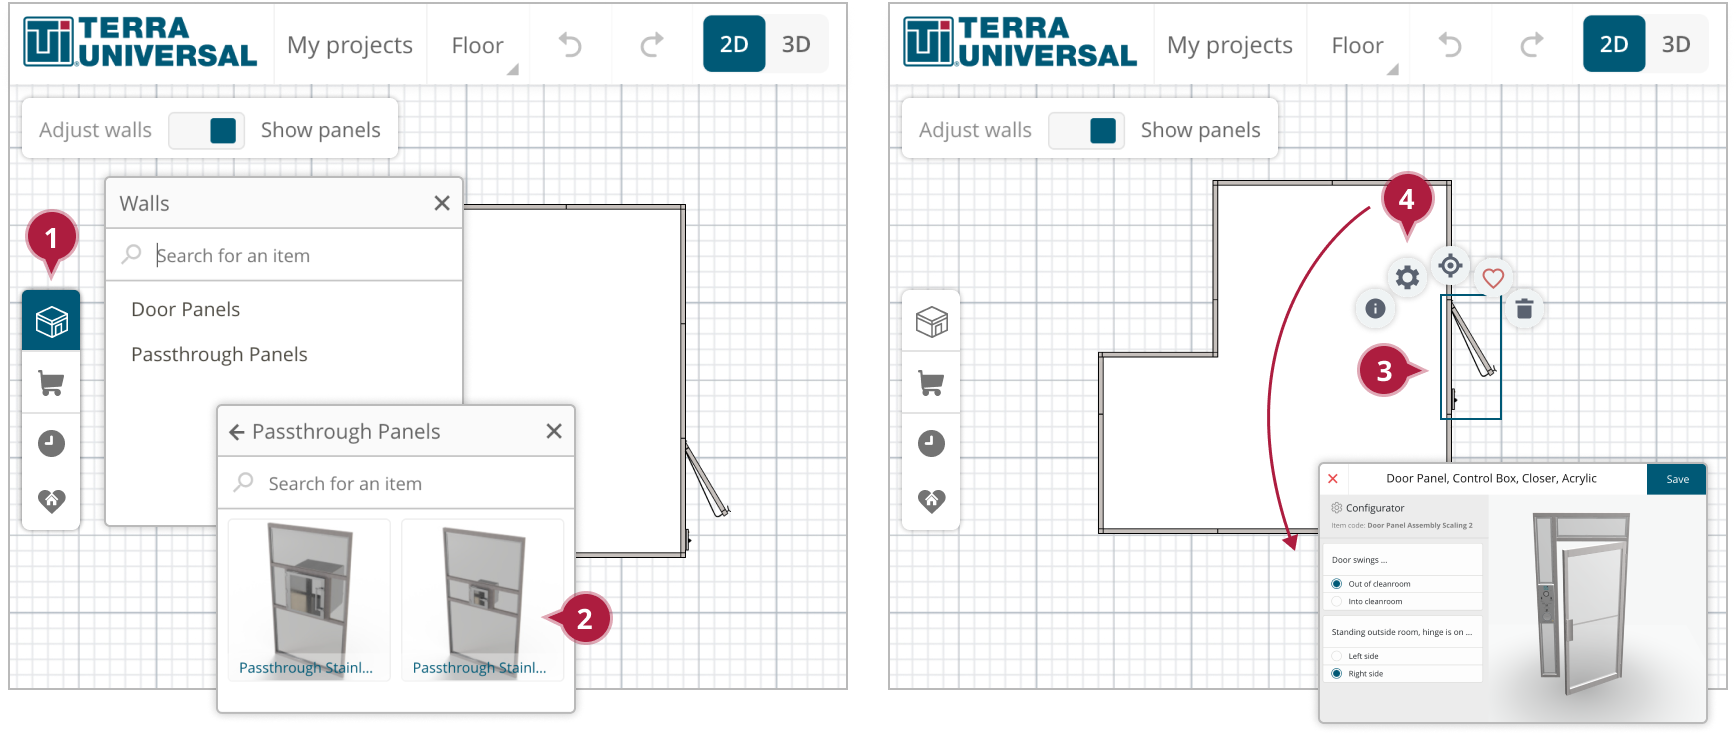
-
- 1 Click Cleanroom icon, select product category
- 2 Click product to drop on wall
-
- 3 Click object and drag to location
- 4 Click gear icon to configure object
5. Adding FFUs and lights to ceiling
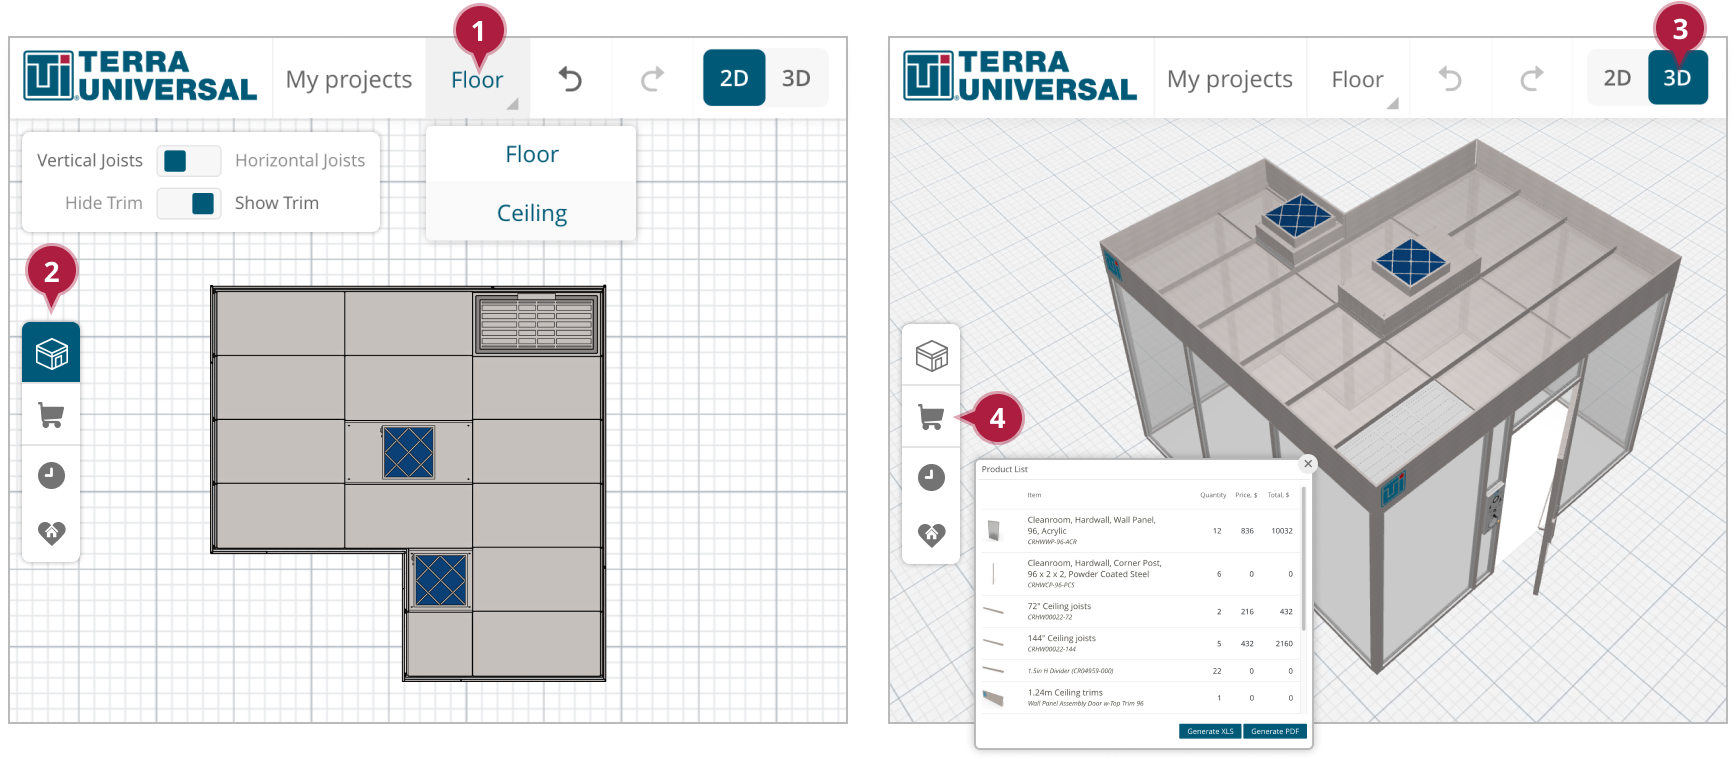
-
- 1 Click “Floor” to open choice, then click “Ceiling”
- 2 Open catalogue and select objects to place on ceiling
-
- 3 Click 3D to switch between 2D and 3D views
- 4 Click Shopping Cart for priced list of components

Video
 Loading Designer 3D app