Terra Pre-Hung Cleanroom Swing Door Installation: Quick Start Guide
Disclaimer: Factory setup and installation guidelines are subject to change. This document should be considered for educational purposes only. Please visit the Terra Universal website for product support and the most recent product support documentation resources.
This quick-reference manual provides cleanroom door installation instructions for Terra Universal's automatic and manual pre-hung swing doors. Part numbers for this guide are associated with the following Terra Universal cleanroom door styles:
Terra Pre-Hung Cleanroom Swing Door Styles
- BioSafe® CleanSeam ™ 316L Stainless Pre-Hung Manual | Automatic
- Stainless Steel Pre-Hung Swing Doors Manual | Automatic
- Aluminum Pre-Hung Swing Doors Manual | Automatic
Browse and Compare All Terra Cleanroom Door Styles Online
- View All Automatic Pre-Hung Swing Doors
- View All Manual Pre-Hung Swing Doors
- View All Terra Cleanroom Door Styles
View the PDF Guide for Complete Instructions
View the Full PDF Guide for Extended Information
Looking for hardcopy instructions with pictorial references and a complete set of instructions? Print the PDF guide. The numerical order of this web document is to align with the current PDF version at the date of publication.
- Complete list of applicable part numbers (Section 1.4)
- Hydraulic Door Operators (Section 4.1)
- Automatic Door Power Requirements (Section 5.1)
- Automatic Door Closer Installation (Section 5.2)
- Handwave Sensor Installation & Adjustment (Section 5.3)
- Door Interlock Install | Setup | Troubleshooting (Section 5.4)
Pre-Hung Cleanroom Styles & Materials Overview
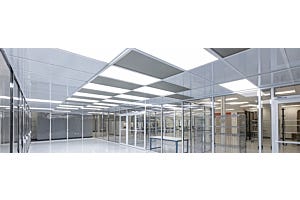
Terra Universal Pre-Hung Cleanroom Doors Overview
Terra's pre-hung cleanroom doors are pre-hung to a frame to allow fast and easy mounting with either stainless steel push or pull handles and heavy-duty stainless steel flush-mounted mortised hinges.
All hardware locations are reinforced with internal steel backing plates. Doors also include an adjustable ADA-compliant heavy-duty hydraulic door closer that meets ANSI Grade 1 standards and a continuous three-sided perimeter gasket for a tight seal. Custom door designs allow for different lock and lever compatibility. The door frame can be customized to a larger thickness on special orders. Following the instructions and recommended maintenance will help ensure a long and efficient service life for the unit.
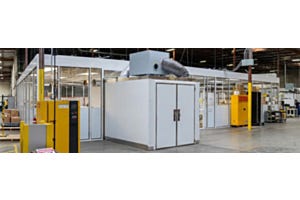
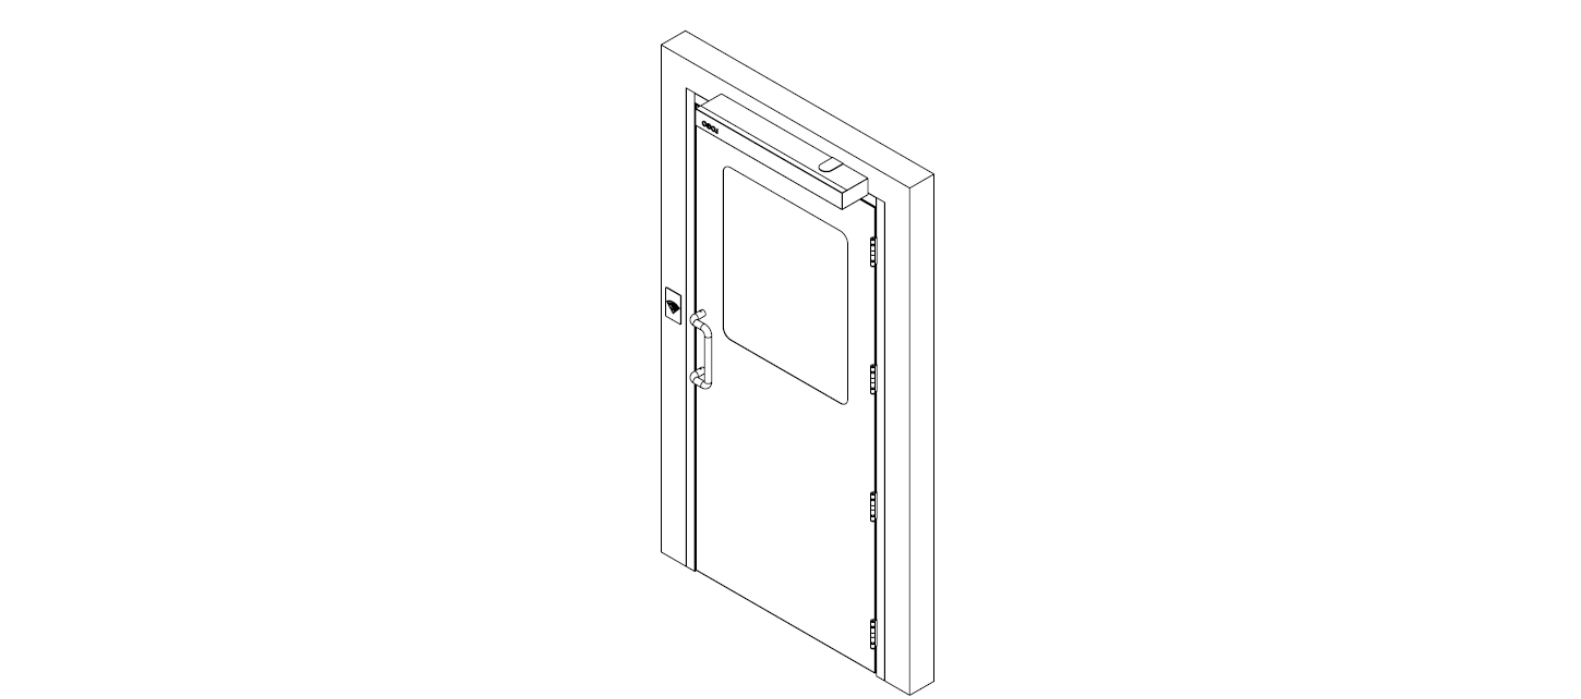
Automatic Pre-Hung Cleanroom Swing Door Overview
Pre-hung automatic swing doors utilize hands-free operation which reduces the spread of germs and cross-contamination and allows easy access for persons carrying objects or pushing carts. These doors have a whisper-quiet operation and are ADA-compliant. Terra's unique door operator system is 65% smaller than other manufacturer models and accommodates either single-door or double-door configurations.
Terra's automatic doors also include an advanced power assist during the opening cycle so that minimal effort is required when operated manually.
The door operator allows for 12 programmable options such as:
- Opening/closing speeds
- Hold-open time delay
- Opening/closing force
- Optional integration with control systems
Terra's automatic doors also include an advanced power assist during the opening cycle so that minimal effort is required when operated manually.
- The automatic door is shipped pre-hung on the specified frame and arrives ready to install into the wall opening.
- The automatic door closer is shipped separately from the automatic door and includes a power cable from the manufacturer of the automatic door closer.
- Automatic doors also include a blow-open feature for smoke ventilation (per NFPA 92B).
- Note: Power must be hardwired by a certified electrician.
- See here for in-depth installation of automatic door closer
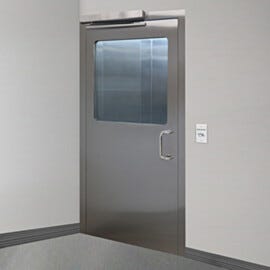
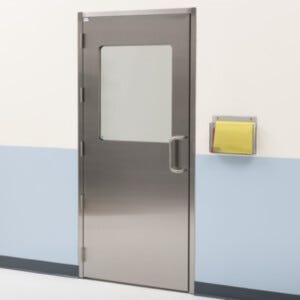
Stainless Steel Pre-Hung Cleanroom Doors Overview
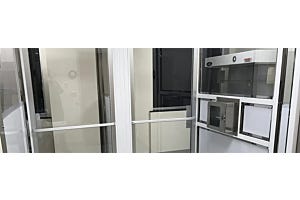
Terra's Stainless Steel Pre-Hung Cleanroom Doors have a flush-mount dual-pane window design that simplifies cleaning. They provide resistance to most chemicals and minimize surface particle shedding. Door handles can be used for every application with a cylindrical lockset and angled design for a durable, easy-to-maintain entry point. Stainless steel door options are available for air showers and tunnels.
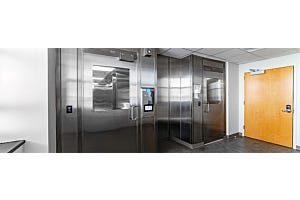
BioSafe® Pre-Hung Cleanroom Door Overview
BioSafe® CleanSeam™ 316L Stainless Steel Doors offer medical-grade, USP-compliant construction for life science applications, such as biotechnology and drug manufacturing. Terra's BioSafe® products include exceedingly clean design and construction for critical operations:
- Continuous-seam welds eliminate cracks and crevices for easy cleaning and sterilization.
- No gaps and crevices where microbes colonize, rounded corners for easy disinfection
- Won’t produce contaminants during sterilization, and exceeds cGMP, IEST, ASTM, and ISO 14664-1 requirements.
- BioSafe® models feature an automatic door bottom, which is comprised of a fully concealed drop-down gasket that seals the bottom gap when the door closes.
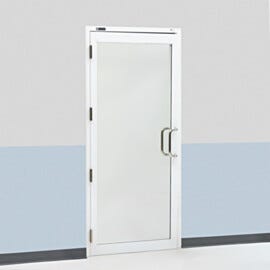
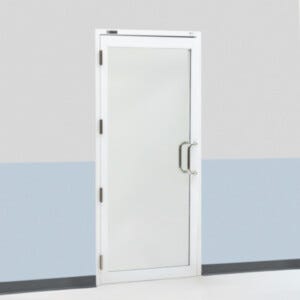
Aluminum Pre-Hung Cleanroom Doors Overview
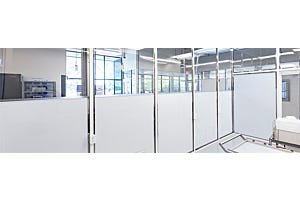
Terra's Pre-Hung Aluminum Cleanroom Doors are appropriate for several different indoor locations including cleanrooms, air showers, and tunnels. The durable powder coating formulation exceeds ASTM and ISO paint standards for hardness, thickness, humidity resistance, gloss, and impact testing. These stand-alone aluminum doors with powder-coated steel frames are ideal for cleanrooms because they can be made to fit any wall thickness. Aluminum door construction provides a low-cost alternative for facilities with less stringent cleanliness requirements. These doors have excellent UV protection and moderate resistance to chemicals and weather.
Manual Pre-Hung Cleanroom Door Overview
Terra's manual swing pre-hung doors have a 180° swinging range and a variety of door handles. Stainless steel manual doors feature flush-mount dual-pane windows that simplify cleaning. Aluminum manual doors offer an economical alternative with a single-pane window design. Both door designs can be configured with optional two-way swinging hinges. These bidirectional doors can be pushed open from both directions for better traffic flow and improved safety. Additional customizable options are available for compatibility with different electrical strikes, locks, and levers for the stainless steel doors.
Note: Any custom electrical or mortised lockset hardware must be sent to Terra Universal before any drawings can be completed.
Pre-Hung Door Setup and Installation Quick Start Guide
2. Safety & Disclaimer
Disclaimer: Terra Universal makes no warranties applying to the information contained in this manual or its suitability for any implied or inferred purpose. Terra Universal shall not be held liable for any errors this manual contains or for any damages that result from its use.
Critical Operation Conditions
- Do not drag the door across the floor – the door should be lifted and carried when being moved.
- Ensure the slab is secured prior to installation.
- Do not put stress on joints, corners or frames.
- Doors should be handled with clean hands or while wearing clean gloves.
- The hinged side of the door must be installed at a 90° angle – use a leveler – or else the door will not be secure.
- Ensure that the door will properly fit in the frame opening – recommended frame opening is 1.75” wider and 3.5” higher than the door unit.
- Consult local building code officials for applicable building codes and regulations. Local building code requirements supersede recommended installation instructions.
- Doors are intended for use in positive or negative-pressure cleanrooms where air movement is acceptable.
- Doors are not hermetically sealed and not intended for spaces mitigating operator exposure to biohazards, chemicals, or nauseating odors.
Disclaimer : This manual pertains to proprietary devices manufactured by Terra Universal, Inc. Neither this document nor any portion of it may be reproduced in any way without prior written permission from Terra Universal.
3. Before You Get Started
First, inspect the door upon arrival to ensure the door is the correct size, design, machining, and color. Also, verify that the door swing mechanism is appropriate for the installation location. If any conditions raise a concern, do not install the door. Contact Terra for assistance with installation, function, or fitment
3.1 Required Tools for Assembly
Required tools for door assembly include:
- Bolts
- Screws
- Screwdriver
- Leveler (bullet or laser; laser preferably)
3.2 Installation of Pre-Hung Doors
Terra's aluminum and stainless steel pre-hung doors use the same knock-down steel U-frame. The U-Frame will arrive assembled and fits on stud frame walls; frames can be customized to various wall thicknesses. Installation requires two or more people to safely and effectively install the door.
Before starting the installation, make sure the frame opening is the correct width and is perfectly vertical, square, and level. If the opening is not correct, it can cause issues with the door fit as well as hardware function.
- Place the U-Frame in the wall opening.
- Secure and flush with the wall.
- Anchor the frame if needed.
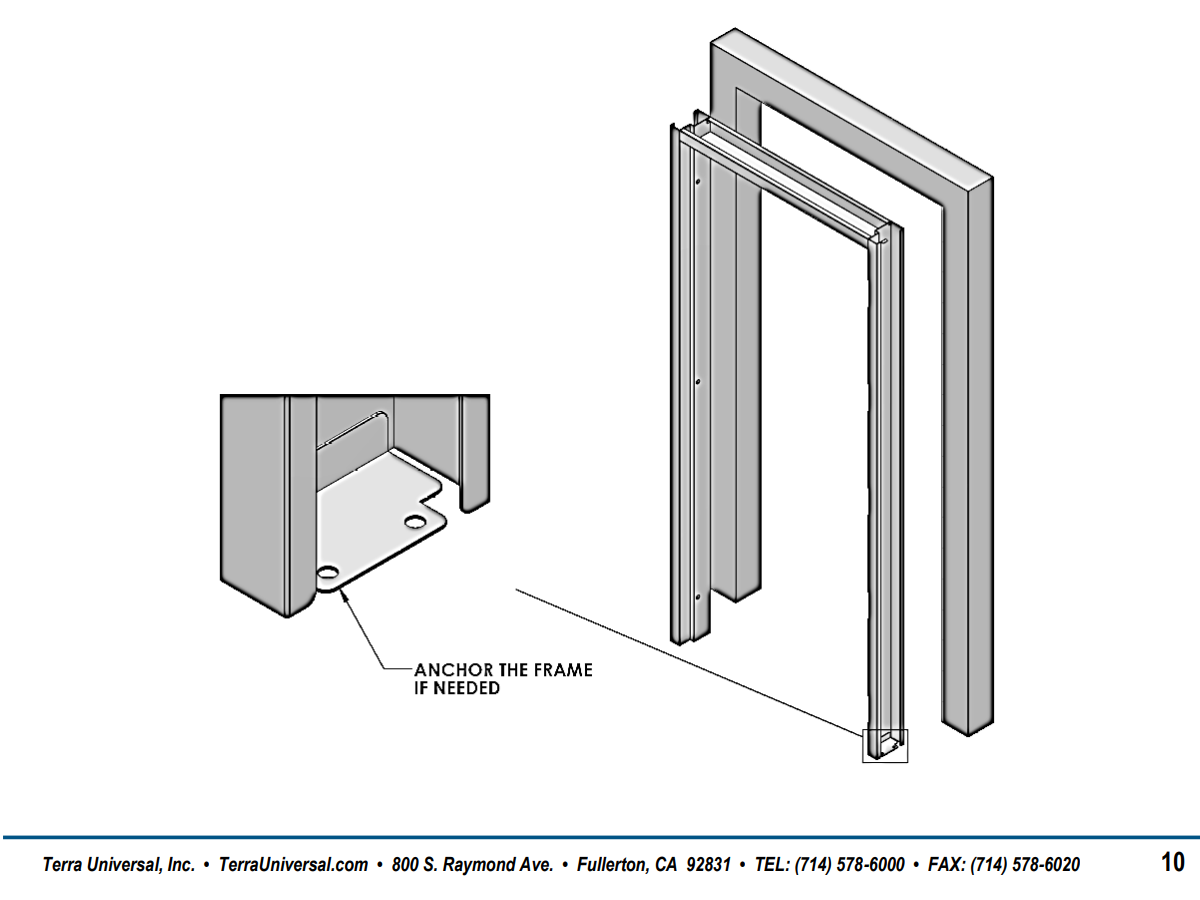
- Fasten the U-Frame to the wall – use screws to secure the support plates located on the back of the frame.
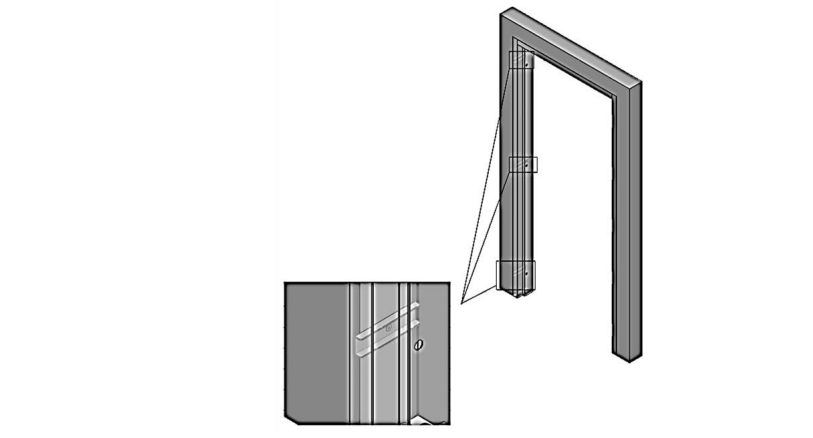
- Ensure screws are drilled straight into the wall. Drilling screws at an angle could cause the door to be misaligned.

- Plug the hole with the provided plastic plug.
- Countersink the two holes on the U-Frame where the screws are shown based on the screws that will be used.
- Attach the hinges to the door using the provided machine screws. Do not overtighten screws.
- Fasten the U-Frame to the wall on the hinge side by inserting screws through the two holes on the hinge plates.
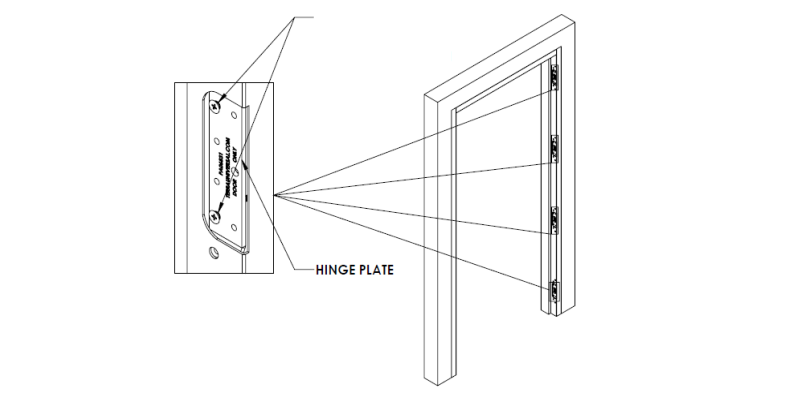
- Ensure hinge screws are drilled straight into the wall. Drilling screws at an angle could cause the door to be misaligned.

- Position the door near the frame.
- Lift the door using a wood wedge (or other support) under the door such that door and frame hinge holes are level.
- Align the top hinge on the door with the top hinge cutout on the frame – install the hinges starting from the top hinge down to the bottom hinge.
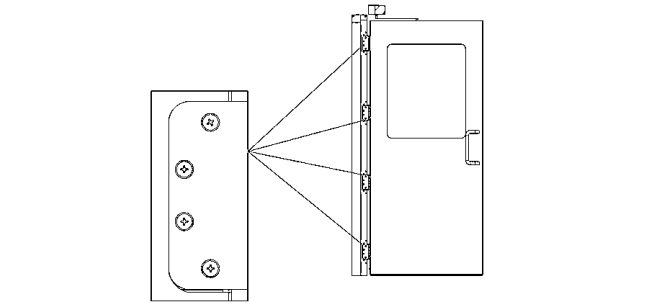
- If the installation requires electrical components, install conduits for low-voltage wiring.
- Align the holes on the hinge plate with the holes on the hinge. Screw the door onto the U-Frame.
- Remove the wood wedge (or other support) from under the door.
- Close the door to verify proper clearances between the rabbet of the frame and the edge of the door. The door should swing freely. If the door does not swing freely, reference the troubleshooting section to understand issues such as bind or alignment.
- Caulk the gaps between the door and the U-Frame.
- Install lockset, closer, or any other auxiliary hardware
For automatic doors:
- Customers are able to use different electrical strikes on the automatic stainless steel doors – the hardware must be sent to Terra before drawings can be completed.
- Customers need to drill a 1” hole to run the wire through the door for the electrical connections.
6. Cleanroom Door Cleaning Instructions
For detailed cleaning instructions view section 6 of the full PDF installation guide.
7. Troubleshooting
7.1 Door Frame Alignment Troubleshooting
| Issue | Cause | Solutions |
| Door sag | Loose hinges |
|
| Worn hinges |
|
|
| Offset at hinge leaf | Hinges not swaged properly |
|
| Door binding | Hinge bind, against rabbet |
|
| Hinge bind, against stops |
|
|
| Twisted door | Compromised Core |
|
| Twisted frame | Wall conditions/ anchoring methods |
|
| Thermal Bow | Inside-outside temperature differential |
|
| Door does not close evenly | Jamb legs are out of alignment |
|
| Door clearance too tight | Loose or missing screws/ Hinge reinforcements |
|
| Door clearance too big | Loose or missing screws and/or Hinge reinforcements |
|
| Lockset off location | Misalignment |
|